One of the best tools for marketing handmade is great pictures of our products. We have read some great tutorials for how to take a good picture. But consider for a moment a few external factors: light and environment?
A great place to take pictures is outside largely due to the fact that you can get pure full spectrum light without any influences of color from the environment. For indoor photographs, only daylight bulbs that are specifically designed for the full spectrum will give off a perfect balance of light with 100 hue of color for your handmade product. If you take pictures with direct outdoor light through a window for the winter time, make sure the window doesn’t have uv light reflective film, that will add more blue to your light and tint your colors more blue.
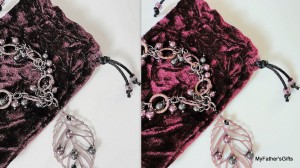
Ever buy an item online that turned out to be a different color than what was in the photograph on the website? There are two factors at play: lighting and color in the environment and computer monitor calibration.
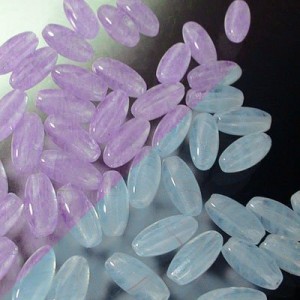
Let’s look at the photographer’s side of things for a moment. Everyone loves the low cost CFL(compact fluorescent lamp)light bulbs. They save you the annoyance of frequent replacement, saves you some energy and can cuts your cost. But the cons often out weigh the pros. First, they are terrible for pictures. Second, they are harmful to the environment (and kids if broken) as they use mercury and phosphorus gases. As far as the type of light, they only display red light..a portion of the full spectrum that you need(red, blue and green). Why is that important? Many gemstones have chemical properties that bend light differently in different types of light. This includes anything hand dyed.
Let’s look at Alexandrite for instance. In pure daylight, the color is a bluish-green and with incandescent light it turns purple-red. So if you color match your design materials with the blue-green, you must make sure you take pictures in the same full spectrum light or your product will be seen as miss represented. Always add information for color changing properties.

What does your environment have to do with it? Your walls and color of your surroundings will bend light differently from the properties in the paint, fabric or dyes. This is what gives it the color your eye sees. If you take pictures in a well lit room, even by pure daylight, and your walls are red, then the amount of blue light is offset by the intensity of red light that is reflected off your walls. This why movie theaters often will paint the walls black. Not everyone loves extreme colors in their photography studios. But if you want the true color of your handmade to shine through your photos without too much photo editing in an advance program like Photoshop, you may want to consider taking pictures either outside or in a very neutral or white environment. The same reigns true for the platform you present your items on.
Computer monitors often will reflect a different color than what is true in real life. Why? Older computers only run on 8-bit colors or 256 colors. New flat HD monitors and handhelds run on a full 24-bit to 32-bit colors that include a good 16,777,216 color variations. That’s pretty huge!

But why does that affect the newer computer monitors? Running full spectrum 32-bit takes computer processing speed. That is why you see newer models with faster processors. Graphic cards must be up to date too or they freeze up the computer. Now, with online games, internet surfers will have their normal monitor colors turned down. When kids run games from cd-roms, they often require 8-bit settings or the images look more like negatives from photographs. With all that in mind, it’s a tough thing to get your products to show up online to visitors with true color. So your best bet is to do what you can on your end and take photos in pure light.
More tips on how to take great photos:
• Take photos of matte objects in bright full light.
• Take close-ups with indirect light and the close up setting for your camera(usually has a little flower icon)
• When you’re the photographer, always try to take pictures with the sun at your back not in your eyes.
• Use indirect light for reflective objects like pearls and crystals. Use a shiny or reflective backdrop like a polished marble tile to set your items on for indirect light photography.
• Use high pixel cameras and save as .gif files so the image does not loose quality and pixelate when zoomed in a lightbox. It also retains quality when file size is reduced for SEO.
• Instead of cropping to shrink the file size, use a photo editor like Gimp 2 for shrinking the size of the file and not the pixels. (example: 1 mb is huge and very slow load times and can be reduced to 150 kb to dramatically reduce load time and thus improve your bounce rates)
Need more editing help? Hire me..Advance Firementor Help